Connector for Service Assurance Manager
The connector for Service Assurance Manager is implemented to link ASM Core and EMC Smarts Service Assurance Manager (SAM). This section of the documentation describes the details of the third-party application, that is, EMC Smarts SAM including:
- The name of the .NET assembly file
- Connection methodology
- The resource and link types that can be discovered on the third-party application
- The attributes of each resource and link type that can be imported into the ASM Core CMDB
- The requirements involved in the handling of Event Management between ASM Core and EMC Smarts SAM
For compatibility and version support details, refer to the ASM Connector Matrix.
You should familiarize yourself with the information in Installing Connectors before installing any connectors, and read the Integration topics for more information on how to configure them.
Use Case Scenario
|
Purpose |
An organization uses Service Assurance Manager (SAM) to discover resources in its organization’s networks and monitor its day-to-day operation. SAM automatically correlates topology and event data from multiple-managed domains to diagnose root cause problems and the impact that those problems have on business-critical processes and services. SAM enables the operations personnel to effectively prioritize their time and resources to maintain and sustain the business-critical processes and services. |
|
Role |
The roles of the connector for SAM are:
|
Connector Description
The table below provides a description of the connector for SAM.
|
Information fields |
Name |
|---|---|
|
Connector |
EMC Smarts SAM <-> ASM Core |
|
Third-party application |
EMC SAM |
|
Assembly |
Infra.Connector.Ionix.SAM.dll |
|
Connector class (Source class) |
IonixSAMConnector |
|
Configuration file |
Infra.Connector.Ionix.SAM.icnf |
|
Connection methodology |
API |
Java needs to be installed on the ASM Core server for the SAM connector to operate properly. The minimum version of Java required for this integration is Java 8, 64-bit.
Connection Parameters
The table below provides a description of the connection parameters.
|
Parameters |
Description |
|
Broker IP address |
IP address of broker. Format: <IPADDRESS>:<PORT> for example, 192.168.0.133:426 |
|
Login ID |
EMC SAM login ID |
|
Password |
EMC SAM password |
|
SAM Domain |
EMC SAM domain (default: “INCHARGE-SA”) |
User Diagnostics
The connector has the facility to trace information. The data can be obtained through Polling tracing or Application tracing.
Licensing
Contact Sales for more information.
The connector for SAM is not a licensed software. Every User can use it free of charge.
Installing the SAM Connector
This section describes how to install the connector for SAM. Installation of this connector is different from the other connectors provided for ASM. The installation instructions given here are only relevant to this connector.
Before you begin using the connector for SAM, ensure that the server has the Windows x64 version of Java Runtime Environment (JRE) installed. This is required to use the connector. You can download JRE from the Java website (Windows x64 version): http://www.oracle.com/technetwork/java/javase/downloads/
- Create folder C:\ASMSAM on theASM web server.
- Copy the file Infra.Connector.Ionix.SAM.DomainManager.jar from the ASM application root folder to the newly created C:\ASMSAM folder.
-
Copy all files from the SAM server '<Ionix SAM installation directory>\CONSOLE\Smarts\classes' folder to the C:\ASMSAM folder on the ASM server
- Create or update the CLASSPATH environment variable in the system so that the connector knows where to find the Java libraries by completing the following steps.
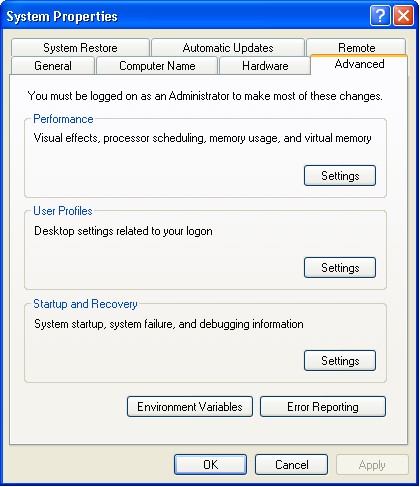
- Go to Control Panel and double-click System. This displays the system properties of the current system.
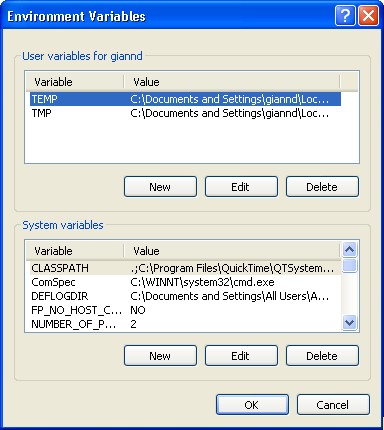
- In the System Properties dialog box, click the Advanced tab and click Environment Variables.

- Find the CLASSPATH environmental variable and click Edit. If there is no CLASSPATH variable, create one by clicking New located in the System variables section.

- Ensure that the Variable name field is CLASSPATH.
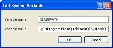
- Click Edit. In the Edit System Variable dialog box, add the following values to the CLASSPATH variable in the Variable Value field:
C:\ASMSAM\Infra.Connector.Ionix.SAM.DomainManager.jar;
C:\ASMSAM\adm.jar;
C:\ASMSAM\certj.jar;
C:\ASMSAM\clsapi.jar;
C:\ASMSAM\cmp_core.jar;
C:\ASMSAM\cryptojce.jar;
C:\ASMSAM\cryptojcommon.jar;
C:\ASMSAM\i18napi.jar;
C:\ASMSAM\icu4j-3_8_1.jar;
C:\ASMSAM\icu4j-charsets-3_8_1.jar;
C:\ASMSAM\iv2query.jar;
C:\ASMSAM\java_probe.jar;
C:\ASMSAM\java_probe_sample.jar;
C:\ASMSAM\jcmFIPS.jar;
C:\ASMSAM\jcommon-0.7.0.jar;
C:\ASMSAM\jfreechart-0.9.3.jar;
C:\vFireSAM\jgl3.1.0.jar;
C:\vFireSAM\jvmif.jar;
C:\vFireSAM\log4j-1.2.13.jar;
C:\vFireSAM\logger-0.0.1.jar;
C:\vFireSAM\masterpiece.jar;
C:\vFireSAM\masterpiece_l10n.jar;
C:\vFireSAM\monitoring_action.jar;
C:\vFireSAM\monitoring_action_sample-javadoc.jar;
C:\vFireSAM\monitoring_action_sample.jar;
C:\vFireSAM\net.jar;
C:\vFireSAM\platform.jar;
C:\vFireSAM\servlet.jar;
C:\vFireSAM\skclient.jar;
C:\vFireSAM\sm_dxa.jar;
C:\vFireSAM\sm_icf_tm_base.jar;
C:\vFireSAM\sm_repos.jar;
C:\vFireSAM\sm_system.jar;
C:\vFireSAM\sslj.jar;
C:\vFireSAM\suite.jar;
C:\vFireSAM\tsgdtj50.jar;
C:\vFireSAM\tsgetj50.jar;
C:\vFireSAM\tsglt50.jar;
C:\vFireSAM\tsgltc50.jar;
C:\vFireSAM\tsgmtj50.jar;
C:\vFireSAM\platform-javadoc.jar; - You can append values to an environmental variable by separating each value with a semicolon.
- Click OK to apply the changes to the system.
- Next, you need to register the connector for SAM in the database:
- Open the ASM Server Console and right-click on the system in which the connector is installed.
- Select Database Tasks > Run Custom SQL Script in the menu that appears. A standard Windows Open dialog box appears.
- In the Windows Open dialog box, navigate to and select the Infra.Connector.Ionix.SAM.Install.scp file which is in the ASM System's Configfolder.
- Click Open.
- Click No when prompted if there are other scripts to run.
- Close the ASM Server Console.
- Perform a Microsoft Internet Information Services (IIS) reset by typing
iisresetin the Run command prompt. - Restart the ASM Connector service.
-
In some cases it may be required to restart the ASM Core server to pick up the new CLASSPATH

This completes the installation of the connector for SAM and makes it ready for use within the ASM application.
Firewall Settings
In certain cases, it is possible that a firewall is present between SAM and the ASM System. In such cases, the firewall needs to be set up so that it allows bi-directional TCP transactions between the system on one side, and the SAM broker and the SAM domain that is decided to be connected to, on the other side. Practically, the firewall needs to allow transactions that use the IP addresses and port details of any of the three entities.
Federated CMDB Population
This section explains how ASM handles resource and link types and their properties in order to populate and manage the CMDB.
The structure of the Federated CMDB in ASM Core has been specially modified to provide a more dynamic approach to the connector usage. With this CMDB configuration, resources and links are presented according to the user’s specific configuration and not according to the configuration file alone.
Functionalities based on Improved Federated CMDB Structure
The connector for SAM proposes a dynamic method that allows for exposure and import of resources discovered and managed by SAM. This method provides the user with the capability of importing every resource present in SAM, and not only the ones that are described in the connector configuration file.
The default option for the connector is to expose resources only from INCHARGE-SA domain. However, the connector has been so built that pulling data from any sub domains does not represent an important development effort.
Resource and Link Types Exposed by Connector
The dynamic model means that every resource type handled by SAM is also handled by the connector.
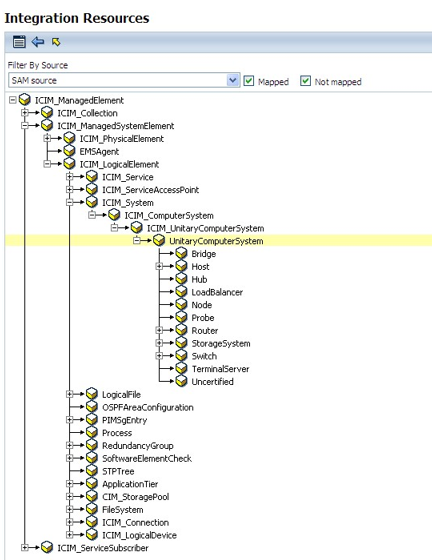
Following the same concept, all the attributes handled by EMC SAM for any resource type would be available when setting up field mappings.
Link Types
A link is defined for the connector by three factors - its name, the higher resource and the lower resource. The higher and lower resources are the types of resources (or resource types) that are located at the ends of the link.
For Resource types, the list of Link types displayed by the connector is dynamically generated. This means that all the relationships available in SAM are listed in this control. 
The ASM Core Integration Platform allows the configuration of attributes for any links exposed by the connector. The parameters that can be modified are:
- Impact Overridden
- Impacts Lower
- Impacts Upper
- Link Status Ref
- Link Type
Event Management
This section provides an overview of the Event Management functionality.
Functionality overview
The purposes of this functionality are:
- To automatically transpose notifications generated by SAM into ASM Core calls or requests
- To maintain the consistency of the information held in the notification and in the item created in ASM Core
Event Management Operation
The running of this functionality relies on the monitoring of the SAM notification queue by the connector for SAM in order to detect any new notifications. When this happens, the Integration Platform compares the attributes of the new notification against some user-defined criteria. if the criteria are met, it proceeds with the creation of a call or problem or a request depending on the user settings.
From a practical point of view, SAM notification attributes can be mapped to ASM Core fields. This mapping is used when creating a new call or request. Upon creation, the ASM Core call or request ID is sent back to SAM and the appropriate notification record is updated to reflect the ID of the item that has been created in ASM Core.
As the notification goes through updates, the connector ensures that these modifications are properly transmitted to the related ASM Core item. The current behavior of ASM Core, upon receipt of such updates and notifications, depends on the Event Mapping settings in the system.
Eventually, actions on the network will be taken and the SAM notification will be marked as Inactive or will disappear from its queue. This fact will also be transmitted to the relevant ASM Core item and the final result (Call Updated, Call Closed and so on) will again depend on the Event Mapping settings.
Specific Use Cases
The following use cases describe the scenario where an organization sets up integration between ASM Core and SAM:
Role Service Manager is responsible for Service Desk and Change operations and SAM is responsible for issuing alerts and root cause analysis.
The table below describes some specific use case scenarios on SAM and ASM Core integration.
|
Use case number |
Use case scenario |
Action |
Event Management transaction |
|---|---|---|---|
|
1 |
SAM sends an alert to ASM Core. |
ASM Core logs a call with this information and automatically forwards the call to the Incident Management group. The analyst takes over the call and clicks the Acknowledge Event button. |
ASM Core sends an Acknowledgement transaction to SAM. |
|
2 |
SAM sends a root cause alert to ASM Core. This root cause possesses a certainty of 60%. |
ASM Core logs a call in response to this alert. The network engineer fixes the issue and clears the alert in SAM. |
SAM issues a Resolve transaction to ASM Core. ASM Core closes the logged call. |
|
3 |
SAM sends a root cause alert to ASM Core, indicating that the root cause is the email server with 60% certainty. Two minutes later, SAM logs a new alert for the same issue, saying that the root cause is actually a switch with 90% certainty. |
ASM Core logs a call in response to the first alert. |
In response to the second alert, SAM issues a Delete transaction to ASM Core. ASM Core closes the call logged as a result of the first alert, and logs a new call based on the second root cause. |
Event Management and Transactions
The use case scenarios in the previous section, and more generally the Event Management operation of the connector, rely on a particular communication protocol between the two systems. This protocol is composed of different transactions that are illustrated below.
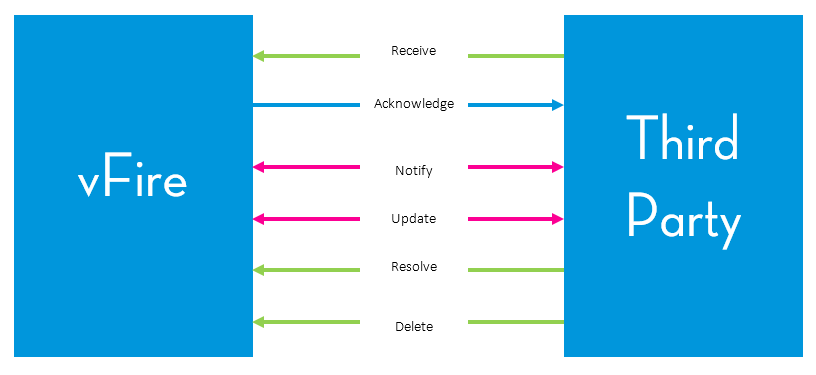
The table below lists the transactions, definition and behavior in the specific case of this connector.
|
Event Management transactions |
Description |
|---|---|
|
Receive |
An event is sent from an external system to ASM Core. ASM Core receives this event. |
|
Acknowledge |
ASM Core sends a transaction to an external system with a formal statement acknowledging that their event has been received. This is different from a transactional acknowledge or not acknowledge (ack or nack) note sent between systems. |
|
Notify |
Occurs when there is a call or request within ASM Core logged due to an event sent from an external system:
|
|
Update |
Occurs when there is a call or request within ASM Core logged due to an event sent from an external system:
|
|
Resolve |
Occurs when the event has been resolved in the external system and a Resolve transaction is sent to ASM Core. The ASM Core call or request is physically closed, a note is added, or it is ignored, depending on the settings in Event Mapping. |
|
Delete |
Occurs when the event is no longer valid on the external system (for example, the alert sent of the root cause with 60% certainty has been superseded by a more accurate root cause at 90% certainty). It also informs ASM Core through a transaction. The ASM Core call or request is physically closed, a note is added, or it is ignored, depending on the settings in Event Mapping. |
Business Rules
|
Transaction |
Rules |
|
Receive |
The Receive transaction leads to a new call being logged, a new problem being created or a request being initiated depending on Integration Platform settings. |
|
A reliable unique ID is stored against any specific call created to ensure proper management of the subsequent communications |
|
|
Any possible data in relation with the time or date of the event or root cause is made available to ASM Core. This allows for possible back-dating of any call or problem logged in ASM Core after it receives a Receive message from SAM. |
There are no business rules for the other transaction types.
Events are uniquely identified by both the event ID and the lastNotifiedAt date, such that for any given event, the connector treats each new occurrence of the same event as a new event in ASM Core. This is because the unique identifier in SAM is only based on the device and the type of event. Consequently, if only the ID is used, the same event type, for example Unresponsive, that occurs much later and for entirely different reasons, would be treated as the same event. Another consequence is that if an event in SAM is resolved and then reoccurs, the ASM Core call number returned to SAM will be matching the initial call logged in ASM Core and not any subsequent calls.
Setting up the Event Management Functionality
Check the following items when setting up the Event Management functionality of the connector for SAM:
- Ensure that the Event Management checkbox is selected in the Integration Platform settings window.
- Ensure that the SAM connector is installed and the check boxes in the Events and Visible columns are selected in the Integration Connectors window.
- Ensure that a SAM source is defined in the Integration Source window.
- Ensure that a SAM Event mapping is defined in the Event screen. This mapping should at least specify the action to be performed (log call or create request) when a notification is carried over, as well as the template to be used for this action.
Starting the Event Management Functionality
If the Event Management checkbox in the Integration Platform administration screen is selected, the Event Management functionality starts running as soon as a proper Event mapping is completed and saved. When starting, the connector checks the SAM notification queue and logs a call for every item that is present and fulfils the criteria that are implemented in the Event mapping. This can lead to a large number of calls being created when activating the Event Management functionality.
One solution to avoid this behavior is to include in the Event criteria setting an item based on the FirstNotifiedAt attribute. For example, you could plan to “go live” with Event management on a precise date and, as a consequence, specify that the value of FirstNotifiedAt has to be after this date before any action can be triggered in ASM Core.
Notification Attributes
The table below lists the notification attributes that are available when setting up an Event mapping.
| Key | Display | Data type | Is multivalued |
|---|---|---|---|
|
Acknowledged |
Acknowledged |
Boolean |
False |
|
AcknowledgmentTime |
AcknowledgmentTime |
dateTime |
False |
|
Active |
Active |
Boolean |
False |
|
AffectedConfigItem |
AffectedConfigItem |
String |
False |
|
AffectedConfigItem is not a SAM notification attribute, it is computed by the connector. It is of reference to a resource type, which means its value can be used to identify a Configuration Item that may have been imported during a previous Federated CMDB scan through the Resolve capability of Event mapping. The value is based on the fields ElementClassName and ElementName of the SAM notification. If these fields are empty, then its value is based on the fields ClassName and InstanceName. If these fields are also empty, then the value of AffectedConfigItem will be null. |
|||
|
AuditTrailSizeLimit |
AuditTrailSizeLimit |
Integer |
False |
|
AutoAcknowledgmentInterval |
AutoAcknowledgmentInterval |
Integer |
False |
|
Category |
Category |
String |
False |
|
Certainty |
Certainty |
Float |
False |
|
ClassDisplayName |
ClassDisplayName |
String |
False |
|
ClassName |
ClassName |
String |
False |
|
ClearOnAcknowledge |
ClearOnAcknowledge |
Boolean |
False |
|
CreationClassName |
CreationClassName |
String |
False |
|
Description |
Description |
String |
False |
|
DisplayName |
DisplayName |
String |
False |
|
ElementClassName |
ElementClassName |
String |
False |
|
ElementName |
ElementName |
String |
False |
|
EventDisplayName |
EventDisplayName |
String |
False |
|
EventName |
EventName |
String |
False |
|
EventState |
EventState |
String |
False |
|
EventStateTable |
EventStateTable |
String |
True |
|
EventText |
EventText |
String |
False |
|
EventType |
EventType |
String |
False |
|
FirstNotifiedAt |
FirstNotifiedAt |
dateTime |
False |
|
FirstScheduledAutoAcknowledge |
FirstScheduledAutoAcknowledge |
Integer |
False |
|
FirstScheduledAutoArchive |
FirstScheduledAutoArchive |
Integer |
False |
|
FirstScheduledAutoClear |
FirstScheduledAutoClear |
Integer |
False |
|
Impact |
Impact |
Integer |
False |
|
InactiveAutoArchiveInterval |
InactiveAutoArchiveInterval |
Integer |
False |
|
InMaintenance |
InMaintenance |
Boolean |
False |
|
InstanceDisplayName |
InstanceDisplayName |
String |
False |
|
InstanceName |
InstanceName |
String |
False |
|
internalElementClassName |
internalElementClassName |
String |
False |
|
internalElementName |
internalElementName |
String |
False |
|
IsAggregate |
IsAggregate |
Boolean |
False |
|
IsAggregatedBy |
IsAggregatedBy |
Boolean |
False |
|
IsProblem |
IsProblem |
Boolean |
False |
|
IsRoot |
IsRoot |
Boolean |
False |
|
LastChangedAt |
LastChangedAt |
dateTime |
False |
|
LastClearedAt |
LastClearedAt |
dateTime |
False |
|
LastNotifiedAt |
LastNotifiedAt |
dateTime |
False |
|
Name |
Name |
String |
False |
|
NextSerialNumber |
NextSerialNumber |
Integer |
False |
|
OccurrenceCount |
OccurrenceCount |
Integer |
False |
|
OriginalSources |
OriginalSources |
String |
True |
|
Owner |
Owner |
String |
False |
|
scheduledForNotify |
scheduledForNotify |
Boolean |
False |
|
ServiceName |
ServiceName |
String |
False |
|
Severity |
Severity |
Integer |
False |
|
ShouldAutoAcknowledge |
ShouldAutoAcknowledge |
Boolean |
False |
|
ShouldAutoAcknowledgeAt |
ShouldAutoAcknowledgeAt |
dateTime |
False |
|
ShouldAutoArchive |
ShouldAutoArchive |
Boolean |
False |
|
ShouldAutoClear |
ShouldAutoClear |
Boolean |
False |
|
ShouldAutoClearAt |
ShouldAutoClearAt |
dateTime |
False |
|
ShouldInactiveAutoArchive |
ShouldInactiveAutoArchive |
Boolean |
False |
|
ShouldInactiveAutoArchiveAt |
ShouldInactiveAutoArchiveAt |
dateTime |
False |
|
ShouldScheduleAutoAcknowledge |
ShouldScheduleAutoAcknowledge |
Boolean |
False |
|
ShouldScheduleAutoArchive |
ShouldScheduleAutoArchive |
Boolean |
False |
|
ShouldScheduleAutoClear |
ShouldScheduleAutoClear |
boolean |
False |
|
ShouldScheduleInactiveAutoArchi ve |
ShouldScheduleInactiveAutoArchive |
Boolean |
False |
|
SourceDomainName |
SourceDomainName |
String |
False |
|
SourceEventType |
SourceEventType |
String |
False |
|
TroubleTicketID |
TroubleTicketID |
String |
False |
|
UserDefined1 |
UserDefined1 |
String |
False |
|
UserDefined10 |
UserDefined10 |
String |
False |
|
UserDefined2 |
UserDefined2 |
String |
False |
|
UserDefined3 |
UserDefined3 |
String |
False |
|
UserDefined4 |
UserDefined4 |
String |
False |
|
UserDefined5 |
UserDefined5 |
String |
False |
|
UserDefined6 |
UserDefined6 |
String |
False |
|
UserDefined7 |
UserDefined7 |
String |
False |
|
UserDefined8 |
UserDefined8 |
String |
False |
|
UserDefined9 |
UserDefined9 |
String |
False |